Getting Started With Stable Diffusion: A Guide For Creators
Everything you need to know to jump right into AI content generation, without breaking the bank.
This is the latest, application-focused installment of my series on AI content generation. Part 1 covers machine learning basics, and Part 2 explains the details of tasks and models. Part 4 is a look at what’s next for AI content generation. Please consider subscribing so you don’t miss any future tutorials!
If you’re building in any of the spaces I cover in this Substack, then you can use this form to tell me about it and I may be able to help you get connected with funding.
With the open-source release of Stable Diffusion in August 2022, content creators who want to get started with AI image generation now have an affordable option with three critical advantages over Open AI’s DALL-E 2:
It’s open to developers to implement in their apps without any oversight or censorship from the model maker. (Compare DALL-E 2’s terms of use, which they will enforce.)
It’s capable of producing images that DALL-E 2 will not due to copyright or “AI safety” reasons.
You own the images you produce. (Compare OpenAI’s ownership of all the images produced by its DALL-E models.)
For now, DALL-E 2 is still where it’s at for photorealistic images, but if you can make more artistic and artificial-looking images work for your application, then you have a rapidly growing menu of Stable Diffusion-based options to choose from.
But wow, there are already a lot of ways to run Stable Diffusion — it’s overwhelming. (At least, I personally find it pretty overwhelming!) But if you’re willing to invest a little time into learning the basics, you can get started without spending any money at all.
Stable Diffusion basics
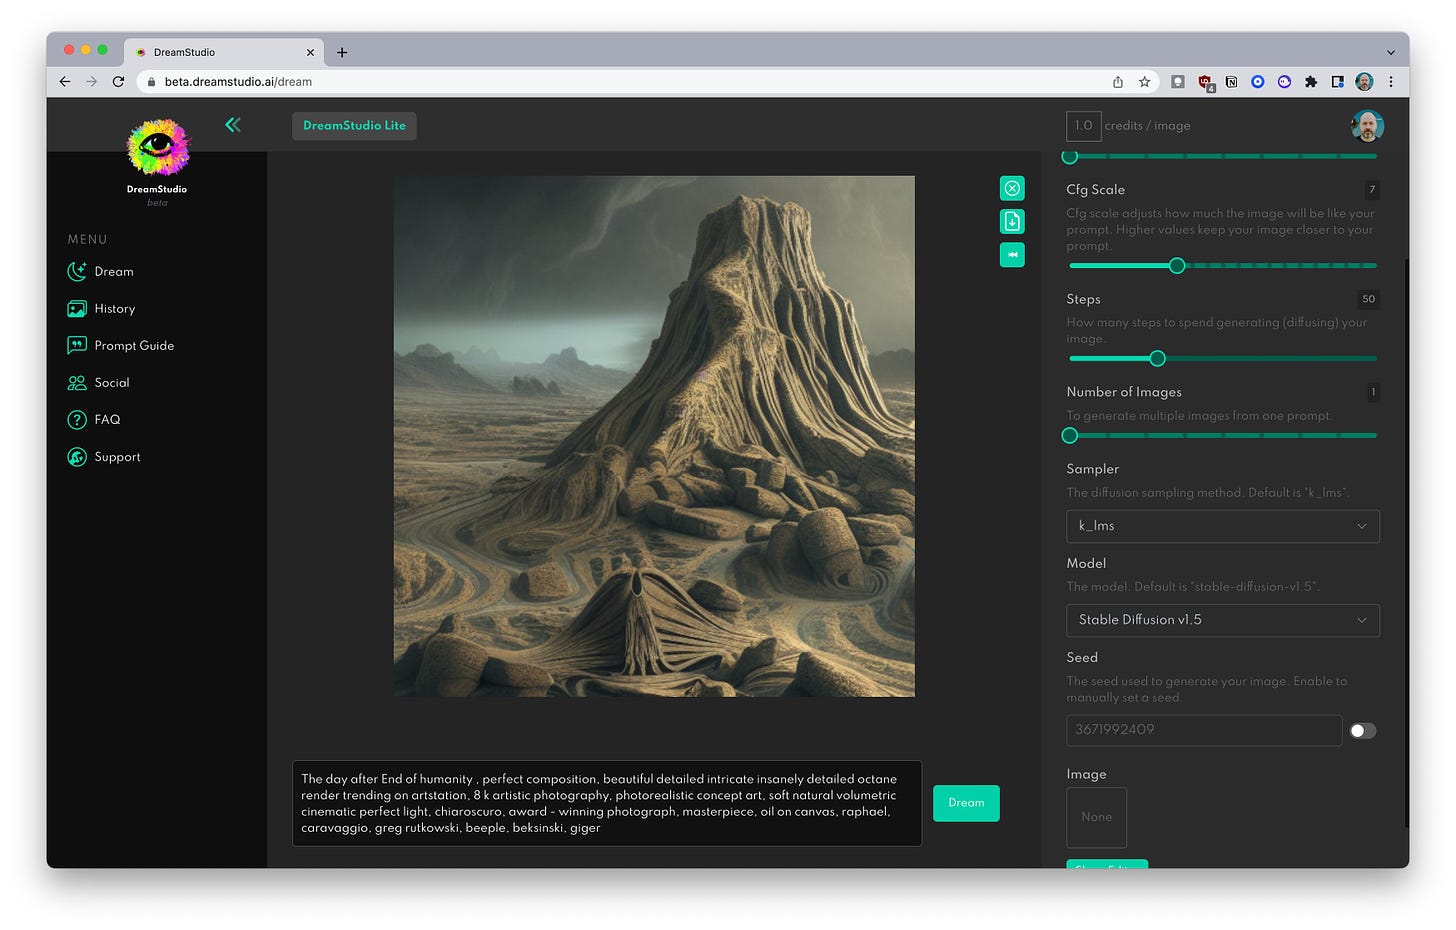
You’ve probably already messed around a bit with Stable Diffusion courtesy of the Stability AI team’s in-house cloud app, Dream Studio. If you haven’t, then stop what you’re doing and go sign up so you can follow along with the rest of this section.
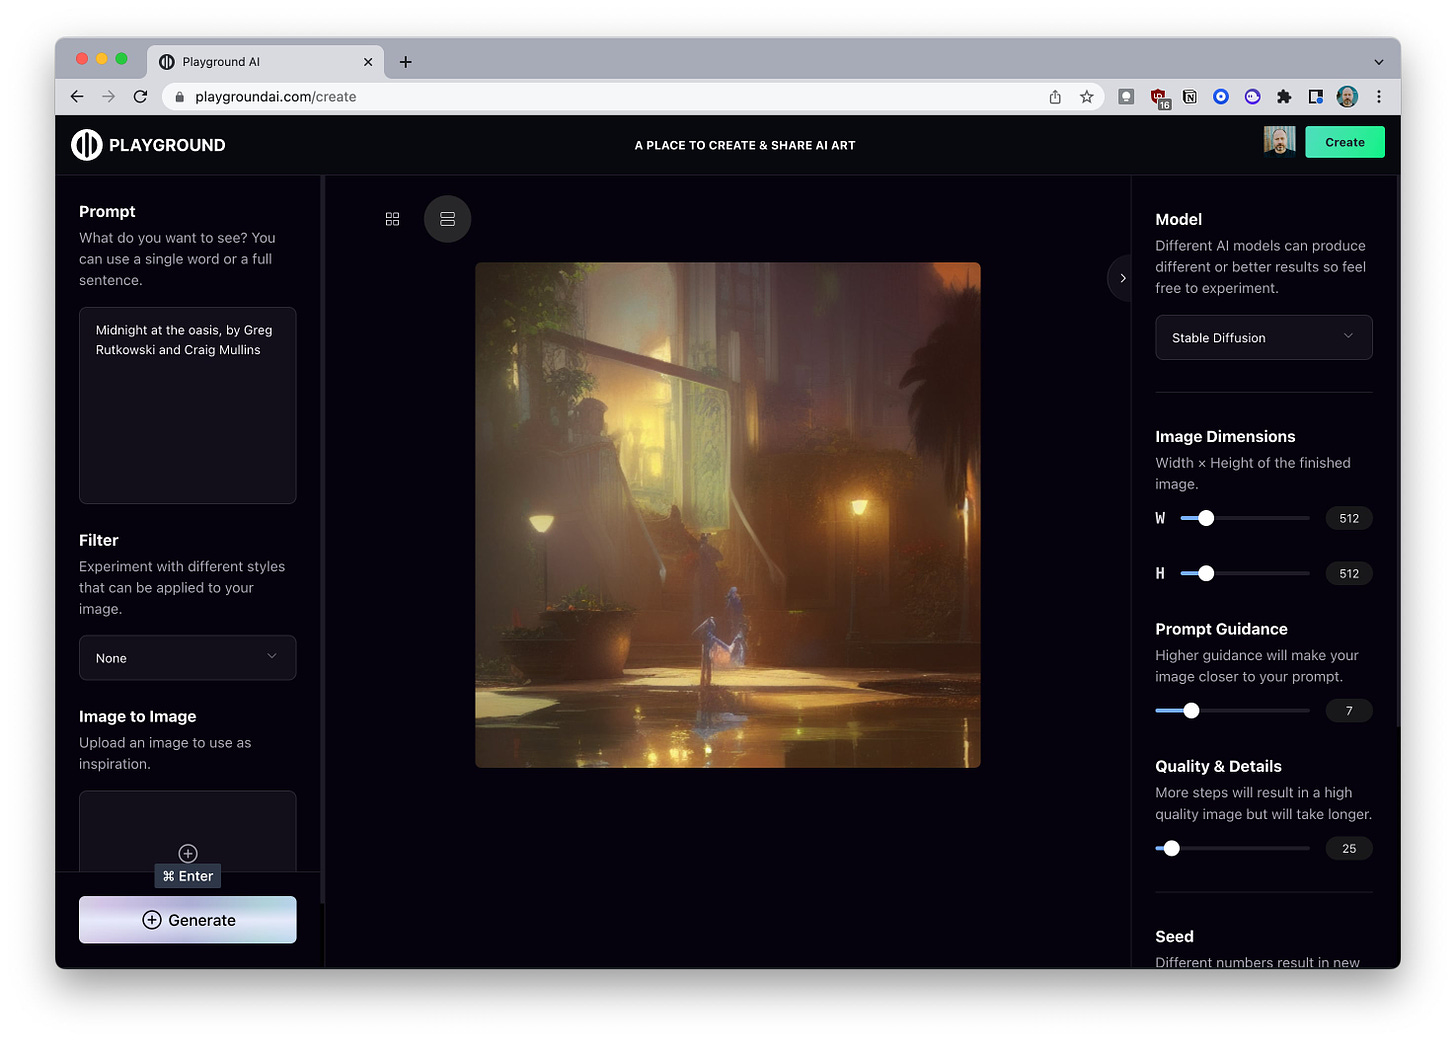
You may end up using some other tool — I’m personally using and recommending PlaygroundAI.com right now — but I do recommend keeping a freebie Dream Studio account because it’s always going to have support for new features that will then trickle out to other apps.
Building on the knowledge and intuitions we gained in Part 1 and Part 2 of the series on AI content generation, let’s dive into how to work with Stable Diffusion using Dream Studio. What you learn here will apply to other apps based on this model.
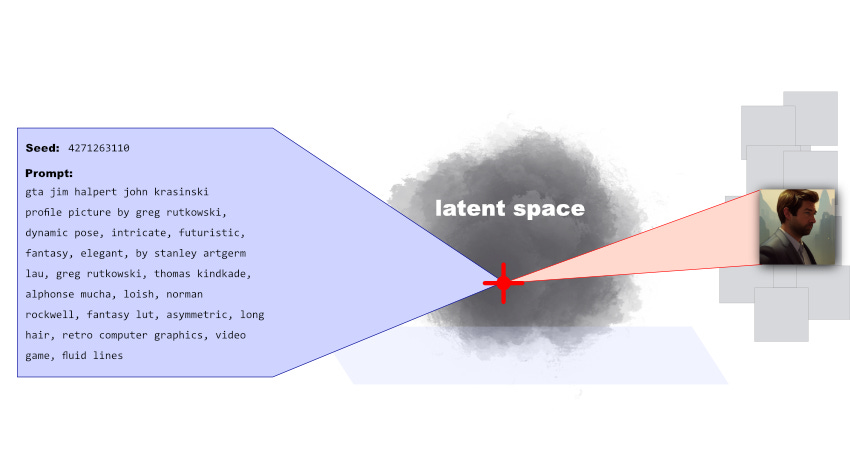
Stable Diffusion takes two primary inputs and translates these into a fixed point in its model’s latent space:
A seed integer
A text prompt
The same seed and the same prompt given to the same version of Stable Diffusion will output the same image every time. In other words, the following relationship is fixed:
seed + prompt = image
If your experiments with Stable Diffusion have resulted in you getting different images for the same prompt (and they probably have), it’s because you were using a random seed integer every time you submitted the prompt:

(Interestingly, this fixed relationship between the seed, prompt, and output image means you can take a given Stable Diffusion output image and seed, and then run the model in reverse to get the original text prompt. As far as I know, though, none of the apps in this article support this capability.)
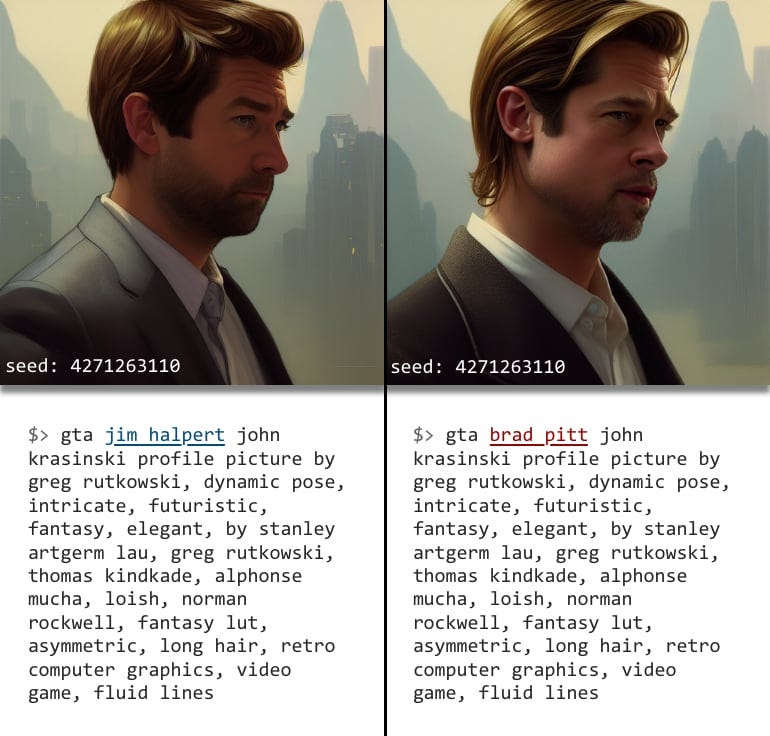
One practical application for the seed + prompt = image equation is that by holding the seed constant you can then subtly tweak the prompt to iterate closer to the exact image you want.
In the picture above, you can see that I fixed the seed at 4271263110 and then changed some of the prompt wording in order to tweak the resulting image. What I’m doing here is navigating around a small region of the model’s latent space, looking for the results I want.
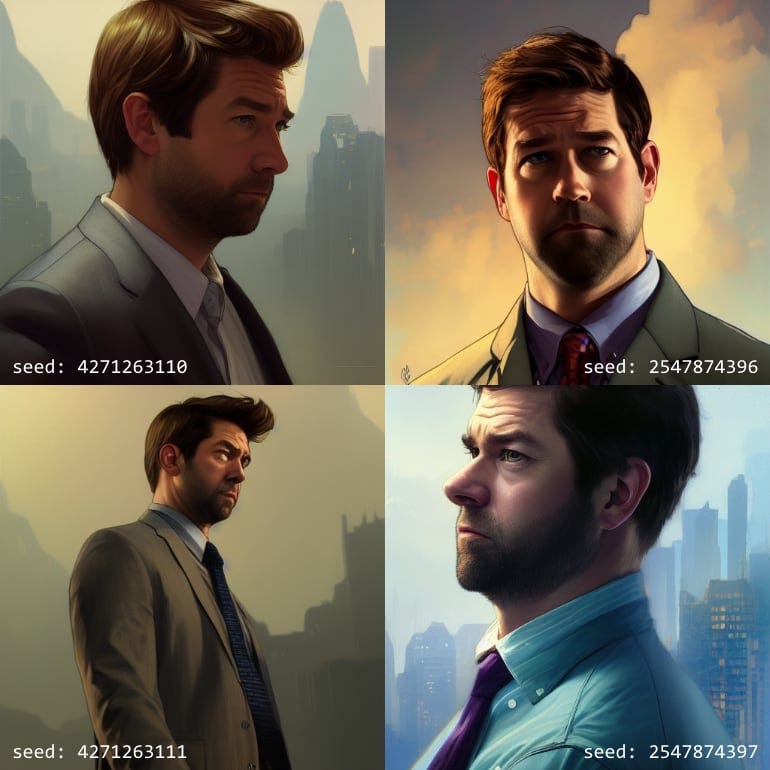
Changing the seed by even a small amount will usually jump me to a different region of latent space, so if I want to experiment with bigger changes then I can try that.
Prompt engineering basics
This business of tweaking your text prompt in order to navigate the model’s latent space to find what you want has a name: prompt engineering.
This isn’t the place for a full introduction to this… I dunno, is it art or science? Whatever it is, a deep dive into it will come in a later, dedicated post. But you do need to understand some basics because prompt engineering presents a set of novel user interface requirements that the first wave of AI content generation apps is frantically trying to solve.
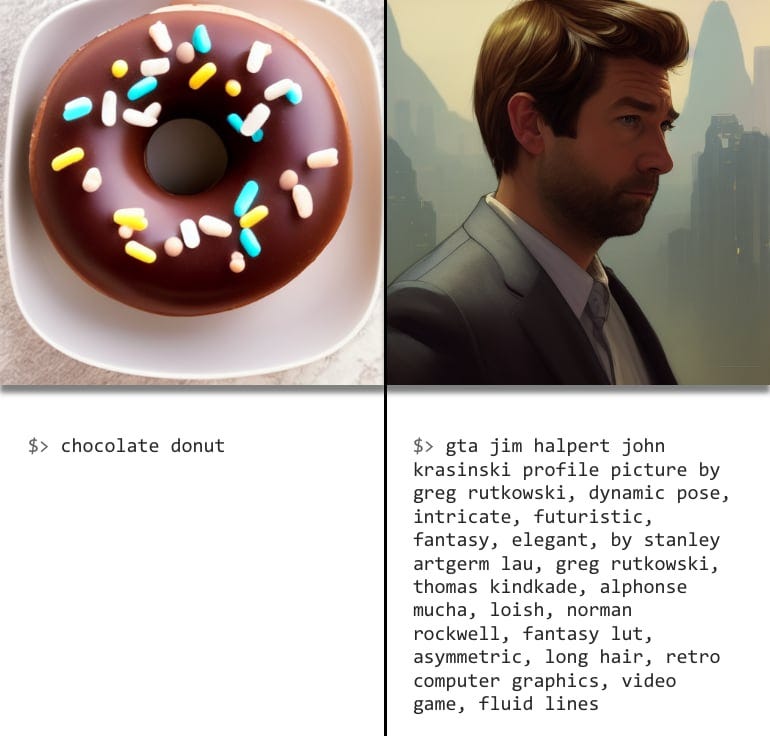
Just like with a Google search, where you try to add specifics to your query so you can narrow in on the right URL in Google’s database, adding specifics to your prompt will get you into the right region of the model’s latent space.
Modifiers and specifics
It’s really hard to know where to get started with building a prompt because no matter how well you think you’ve explained yourself to the AI, the odds that you’ll miss the target on the first try are quite high.
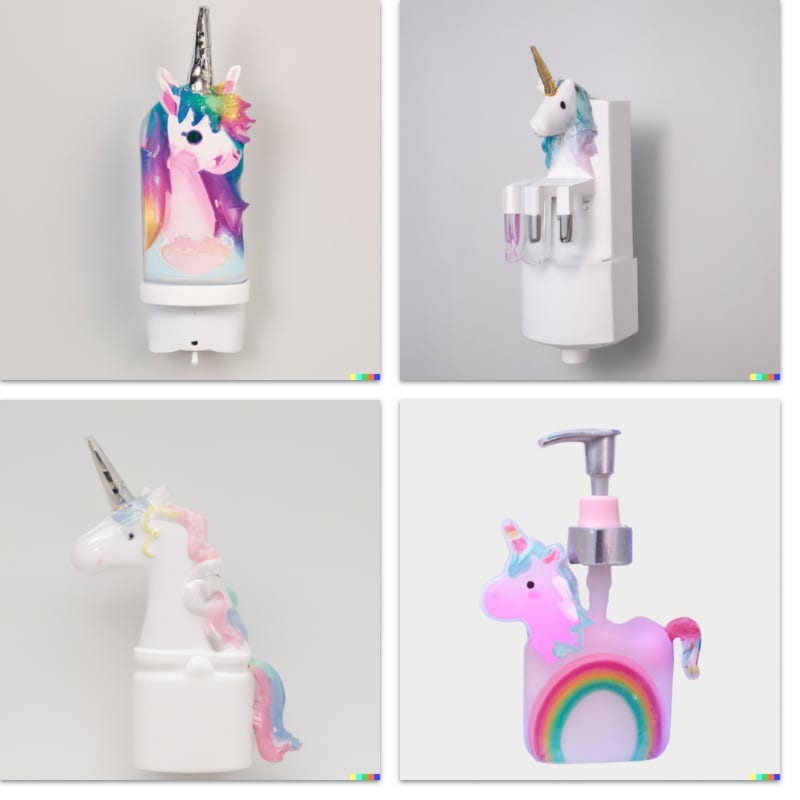
Take my 9-year-old daughter’s first DALL-E 2 request for a “unicorn hand sanitizer,” which I turned into the prompt: “A realistic photograph of a unicorn-themed hand sanitizer dispenser.”
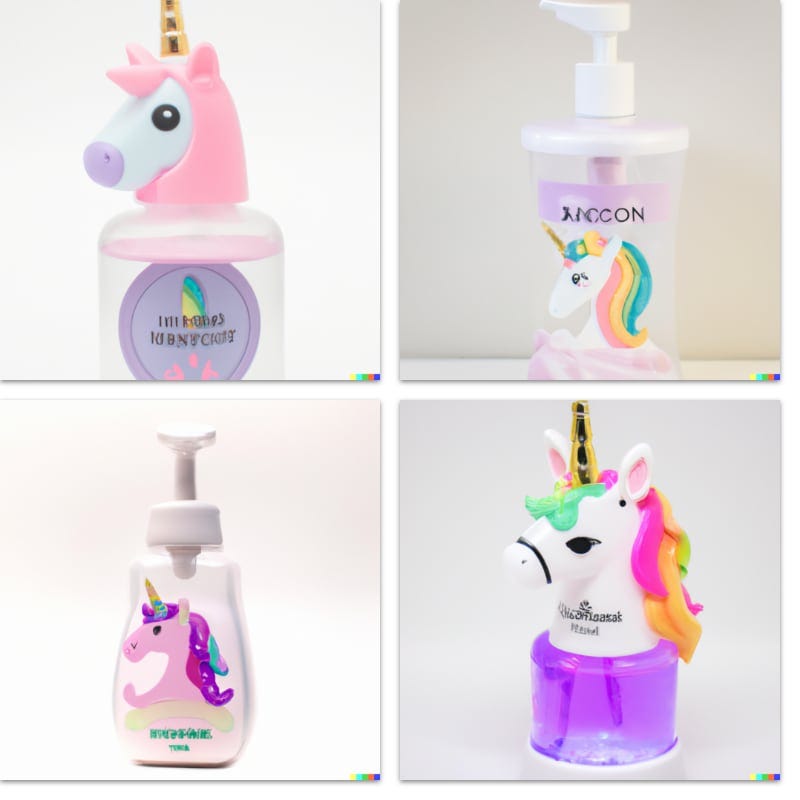
To me, the results above looked spot-on — this was exactly what I was envisioning in my mind’s eye when she gave me the prompt to type in. But she gave these images a big thumbs down because she had envisioned a unicorn-themed hand sanitizer dispenser mounted to a wall.
In this case, once we specified “wall-mounted” in the prompt we got closer to the goal:
This story nicely illustrates an important rule of prompt engineering: the more specific the idea you have of what you want to see, the more relevant words you’ll need to add to the prompt in order to produce it.
Notice that I said “more relevant words,” above. The “relevant” is important because you can make a long, rambling prompt that’s still too vague. You need to pile on the modifiers that most closely relate to the result you want.
Here’s a tip: Imagine you’re writing a description of your desired image for a web page, which people will be putting into Google to search for your image. Ask yourself what terms users would probably type into Google in order to find your image if they had already seen it and wanted to locate it again. Make a list of those terms, and then use all of them in the prompt.
Some caveats with the “search query” approach
The drawback to the search query approach I’ve advocated here and in previous articles is that the Google interface often gives you an effectively infinite number of results for both URLs and images. So we’re all accustomed to pecking out a short search query and then scrolling until we find what we’re looking for.
Google also personalizes your results by taking in a lot of other data, from your prior search history to your geographic location, in order to infer search intent and improve quality. A page of Google results, then, reflects all the detailed knowledge that Google has about me and my particular interests.
AI content generation tools have none of this added capability, yet. There’s no hidden support from personalized algorithms — it’s just you, the model, and the prompt. And of course, there’s no scrolling (yet). So if you can imagine a world where Google gave you only a handful of completely unpersonalized results before making you modify your prompt and resubmit, that’s the mindset you’ll need for Stable Diffusion and similar tools.
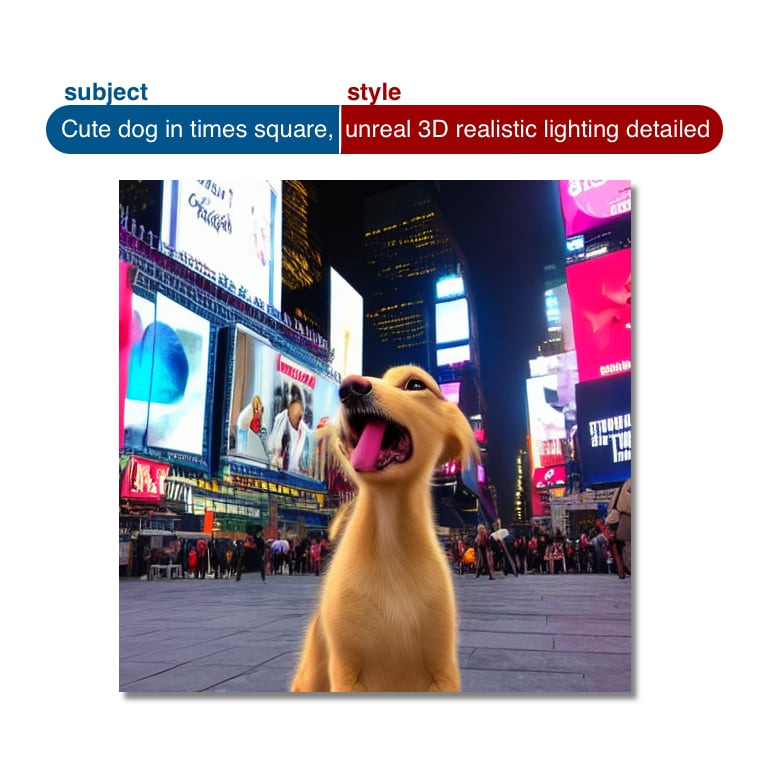
Subject and style
I’m currently thinking of my prompts as having two parts:
The subject I’m trying to render, i.e., a liger, a cityscape, a winged cyborg demigod, etc.
The style I want the subject to be rendered in, i.e., photorealistic, Unreal engine render, anime, Studio Ghibli, pastels on canvas, etc.
When I’m putting together a prompt, then, I’ll think about the modifiers I want for the subject so that get the specific thing I’m imagining, and then I’ll try to polish it with a string of style modifiers.
Practice makes perfect
There are two ways to get better at prompt engineering:
Practice
Stealing other people’s prompts and then repeating step 1
In other words, you’re going to need a way to practice and a source of high-quality prompts to imitate. Solving the first of these problems is going to involve making decisions about where you run Stable Diffusion (on your local machine or in the cloud), and about what tools you use for prompt discovery.
The cost, functionality, and accessibility parameters that will make one mix of tools better than the other for your specific case are not only impossible to predict, but they change literally every 12 hours or so because of the pace of new releases in this space. I’ll offer some guidance below on the “local vs. cloud” question, but otherwise the only thing I can do is tell you what I’m currently doing and ask for other people to post their workflows in the comments.
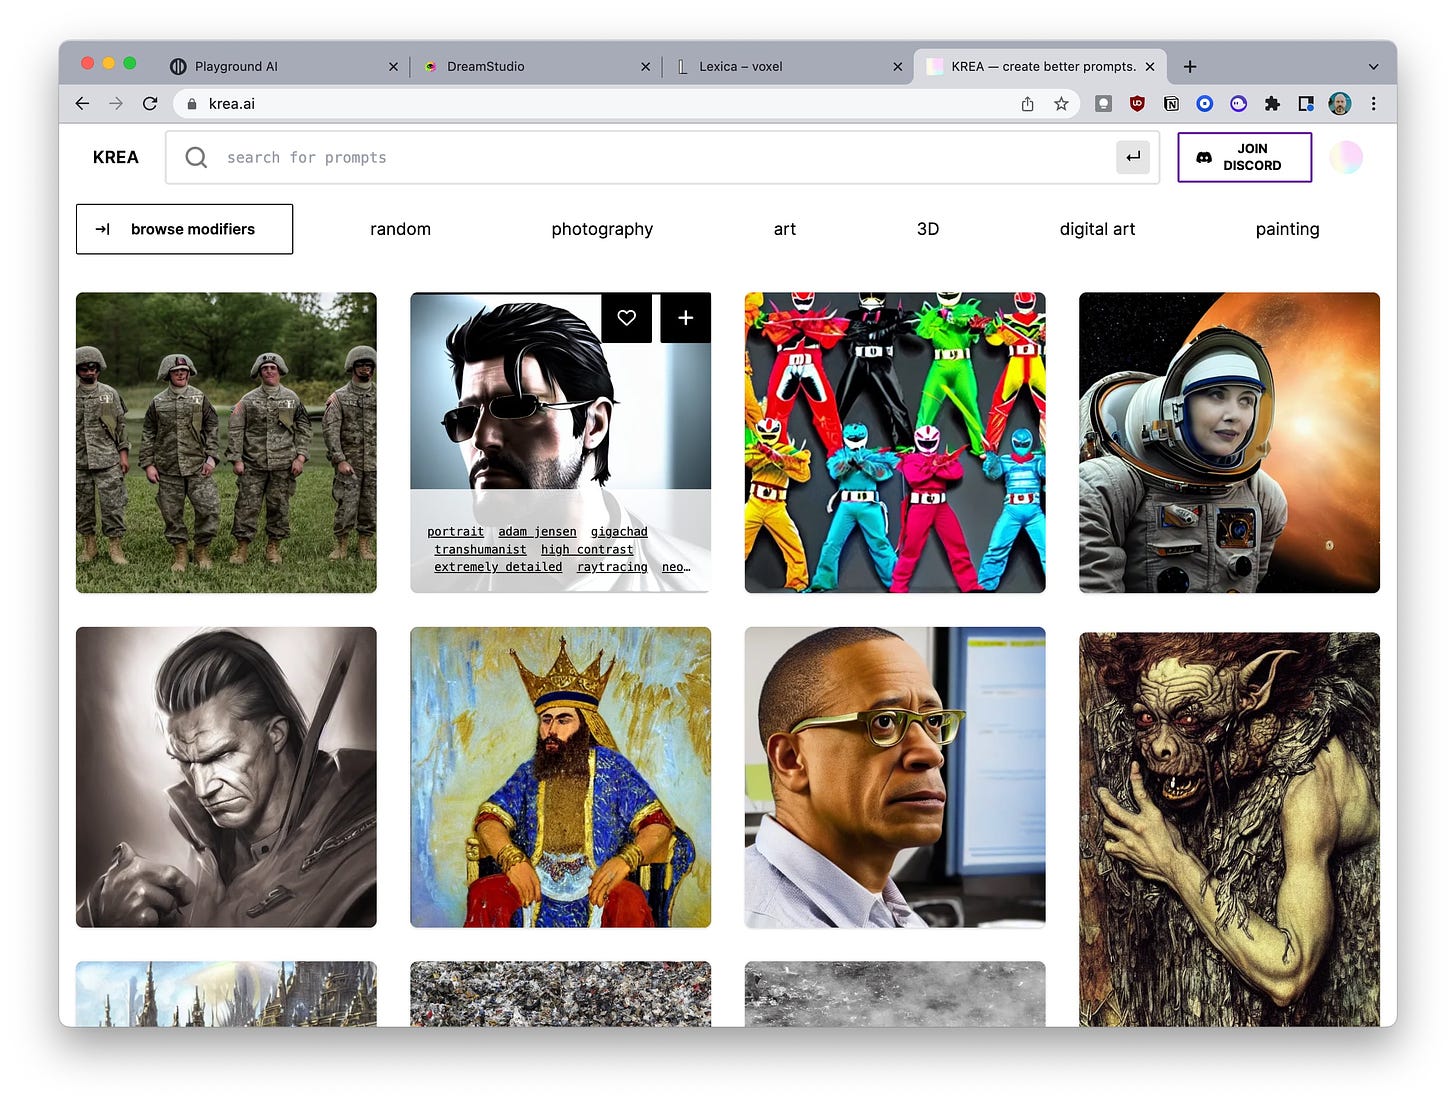
For prompt discovery, I’m currently using Krea.ai. I’ve found this tool to be really effective for finding interesting images that I’d like to adapt, and my kids and their friends (whom we’ve recently AI-pilled) are also big fans of it. Krea.ai supports browsing and searching, and I find I use both depending on my needs.
In addition to Krea.ai, there are two other similar prompt sources I’ve come across that I like:
I’d say bookmark as many of these types of prompt discovery tools as you find, and use them all. (Also, please share any new ones you come across in the comments.)
For actually iterating on the prompts that I find on Krea.ai, I’m using PlaygroundAI.com. PlaygroundAI has a number of things going for it right now:
The team behind it is very good. (I know who it is but I’m sworn to secrecy!)
They are iterating rapidly. I’m in their Discord and there’s a constant flow of new features.
They’re not charging for prompts, yet.
They expose all the useful customization options.
*whispers* you can use DALL-E 2 with it!
So while I used Dream Studio for the intro to this article, I’m currently using PlaygroundAI to do all my image generation.
When PlaygroundAI implements image credits or some other form of payments and quotas, I may start recommending a local install just for the learning phase. The ultimate point is that you want to be able to do experiments and learn without worrying about the cost. Whatever combination of tools lets you do that is the one you want to start out with.
Read more:
I made a list of useful resources for prompt engineering on SD
Me and someone else have created a prompt engineering sheet for DALL-E 2!
A word about “filters”
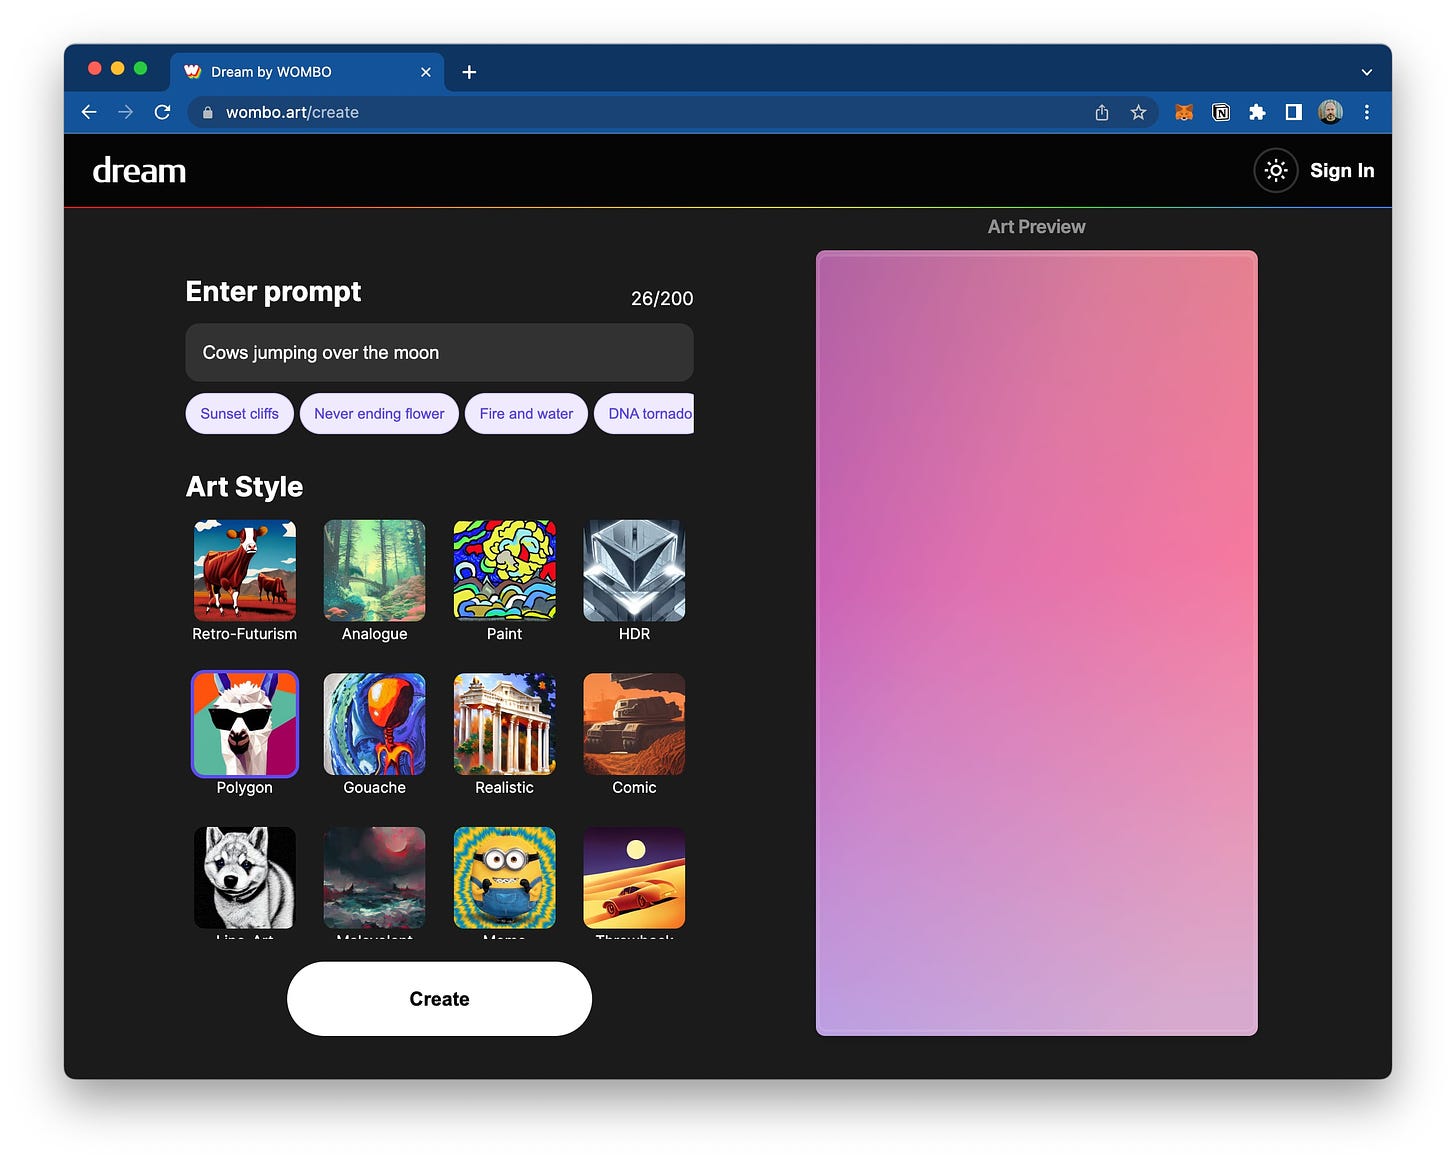
One of the UI patterns I’m seeing emerge in image generation tools is the “filter” metaphor.
The idea here is that you enter a prompt, click a “filter” option, and the model renders your prompt in that style. I think some naive users are going to imagine these as filters on the model’s output, but they’re really filters on your text input.
What’s actually going on here is that the platform is just appending some style words to your (presumably subject-only) prompt before feeding it into the model.
I don’t know that I love this “filter” idea. It would be better to frame these as “mix-ins,” “added ingredients,” “modifiers,” or even “toppings.” Something that gives a flavor of the way the platform is adding some words to your prompt to get the desired effect.
I also think that the platform should always show you the full text of the resulting prompt string after whatever modifications it’s making are applied.I personally derive value from the training I get from clicking on different options and seeing a kind of “command line” view of how they’re modifying the input prompt. Thankfully, more of the tools are starting to do this, at least on my informal survey.
While I’m giving out free consulting advice to the field of AI image generators, I’ll also add that this subject + style distinction might be usefully surfaced in the UI. You might have one field for the subject, with some helpful guidance (tooltips, links to help pages, other affordances), and then a separate widget for applying styles to the subject.
My recommendation Stay away from these filters if they don’t level up your knowledge of prompt styles by showing you how they’re changing your input. You want to always be learning, because the better you are at prompt engineering the less money you’ll need to spend to get good results.
Stable Diffusion options
Stable Diffusion has a number of options you can adjust to modify how it treats a particular prompt + seed pair. Some of these, like image height and width, or number of output images, are obvious. But there are two that are a little more subtle and worth looking into.
(I’m not getting into the sample option here, because in my experiments the effect is really subtle. But I may look at it in a later post.)
Cfg Scale
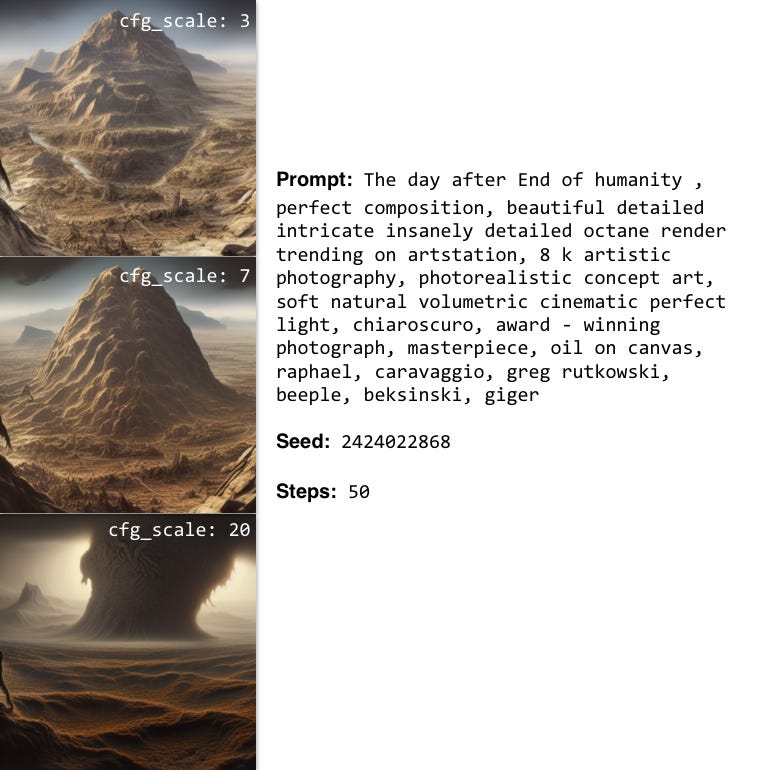
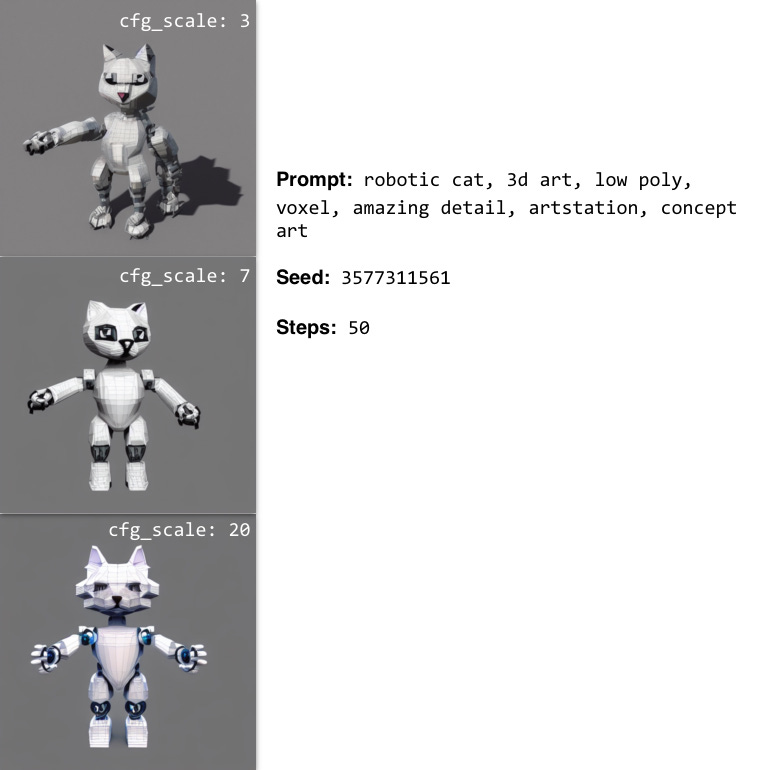
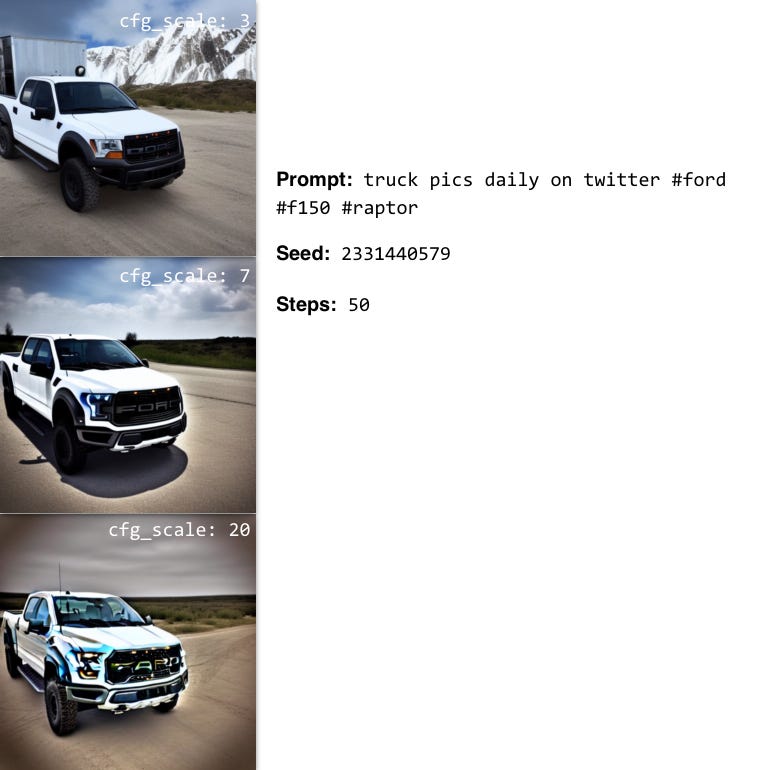
This term stands for Classifier-Free Guidance Scale and is a measure of how close you want the model to stick to your prompt when looking for a related image to show you. (This is called “Prompt Guidance” in PlaygroundAI.) A Cfg Scale value of 0 will give you essentially a random image based on the seed, whereas a Cfg Scale of 20 (the maximum on SD) will give you the closest match to your prompt that the model can produce.
It’s worth trying to develop an intuition about this value in terms of latent space. The following analogy isn’t perfect, but it should give you a sense of what you’re doing:
Imagine your prompt is a flashlight with a variable-width beam, and you’re shining it onto the model’s latent space volume to highlight a particular region — your output image will be drawn from somewhere within that region, depending on the seed.
Dialing the Cfg Scale toward zero produces an extremely wide beam that highlights the entire latent space — your output could come from literally anywhere.
Dialing the Cfg Scale toward 20 produces a beam so narrow that at the extreme it turns into a laser pointer that illuminates a single point in latent space.
With the command line version of Stable Diffusion, you can actually use a negative cfg scale value. Negative values work the same as above, but the output you get is from the opposite side of latent space to the point you highlighted. So with our prompt-as-flashlight analogy, you’re still highlighting the same region or point in latent space, but then you’re taking the extra step of finding its opposite coordinates and rendering the image from those.
For a more technical discussion of this parameter, see this paper by the OpenAI team.
To give you a sense of what this looks like in practice, what follows are sets of images with all other options (including prompt + seed) held the same, but cfg scale is changed as indicated below each image:
To give some useful variety to the above illustrations, I tried to pick an abstract image, a simple image, and a product photo image from Pinterest. It’s actually kind of hard to detect a pattern there, because, for the product photo and the simple image, the lower cfg scale value yielded the most dramatic changes, whereas the opposite was true for the abstract image.
For some really nice animations that take a single prompt + seed and walk it up the cfg scale from 0 on up to different values, check out these Reddit threads:
Diffusion steps
Stable Diffusion gets its name from the fact that it belongs to a class of generative machine learning called diffusion models. These models are essentially de-noising models that have learned to take a noisy input image and clean it up.

A simple diffusion model — one that doesn’t have a text component that lets a text prompt guide the de-noising process toward a particular point in latent space — will produce a random image given an input that’s purely random noise. Or, if you give it an input with a bit of noise, it’ll try to clean that up for you.
Crucially, these models do their de-noising work over a series of passes, or steps.
The model takes a noisy input image, then produces a slightly less noisy output image.
Then the program feeds that output image back through the model for another de-noising pass.
The program repeats steps 1-2 above, feeding the output of step 2 back into step 1 as input until we tell it to stop.
The number of de-noising passes the image makes through the model is the number of diffusion steps.
Most of the tools we’ll be working with won’t let you put the value 1 in for the number of steps — 10 is the common minimum. But if you work with a local tool and do only one step, you’ll get something like the following (prompt was Midnight at the oasis):
Cranking the number of steps up to 10 yields the following:
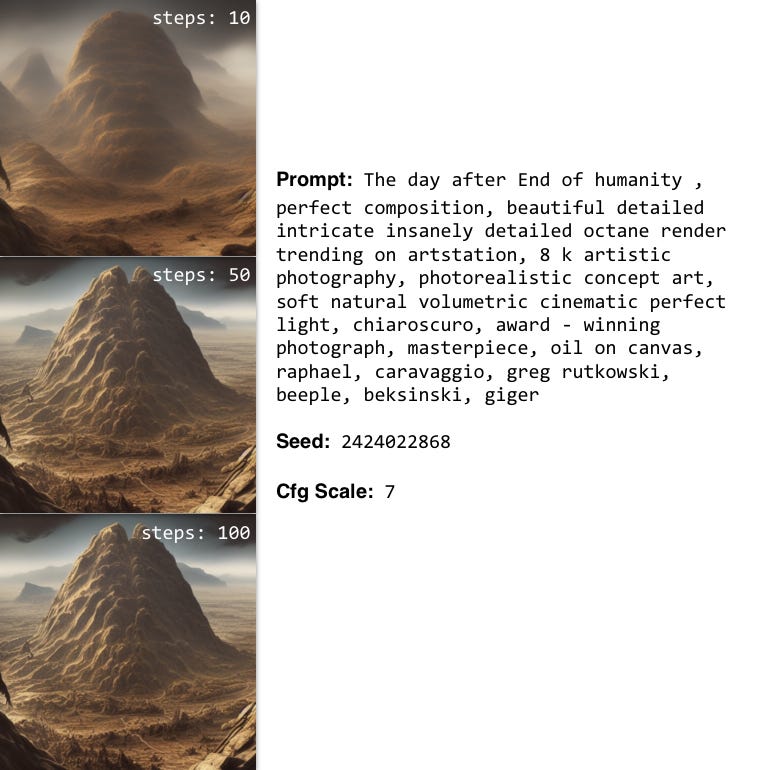
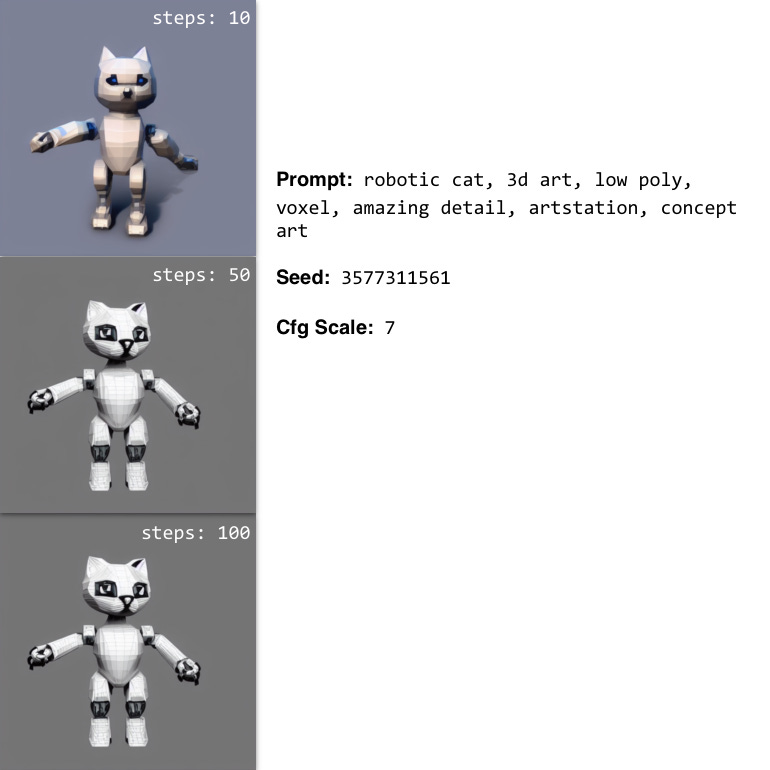
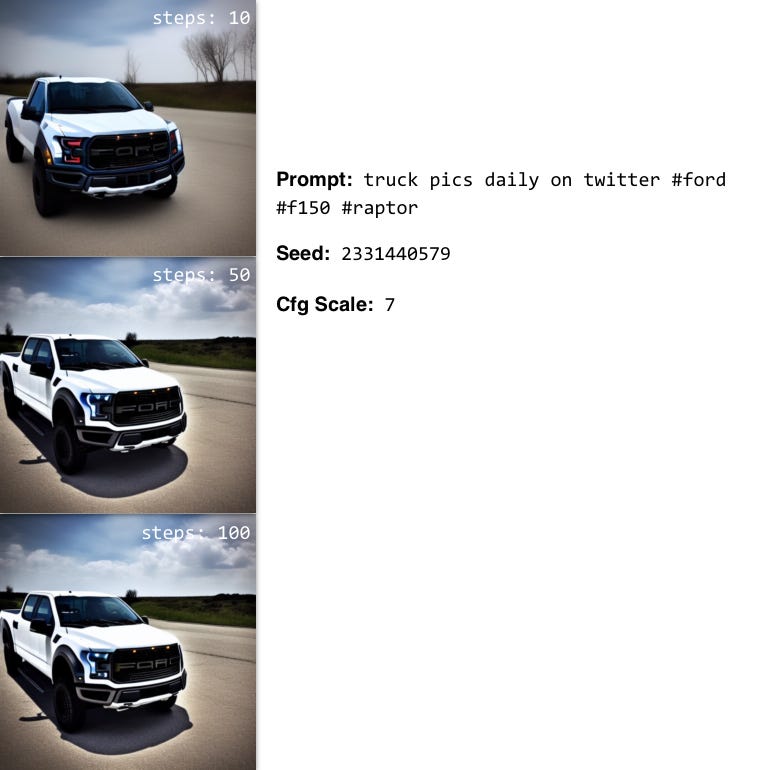
Often, depending on the type of image, it’s hard to predict what the impact of adding steps will be. A general rule of thumb is that more steps mean more detail, but in some cases, you may not want this.
For instance, I actually like the low-diffusion cat model below the best out of all the options — it gets closer to what I had in mind with my prompt. You’ll need to experiment and find out.
Working with images
You’ve probably seen some demos already of Stable Diffusion turning people’s lame drawings (or their kids’ lame drawings) into legit-looking art. This is real and is very cool. But the other thing you can do is modify your images to fill in parts that are missing using a technique called inpainting.
As is the case for prompt engineering, working with images deserves a more extensive, dedicated guide. But just to get you started, I’ll briefly describe how both of these tools work.
Image-to-image generation
When it comes to image modification, you’re going to take everything you’ve learned so far about text to image and add two new inputs:
A source image that acts as a kind of second prompt.
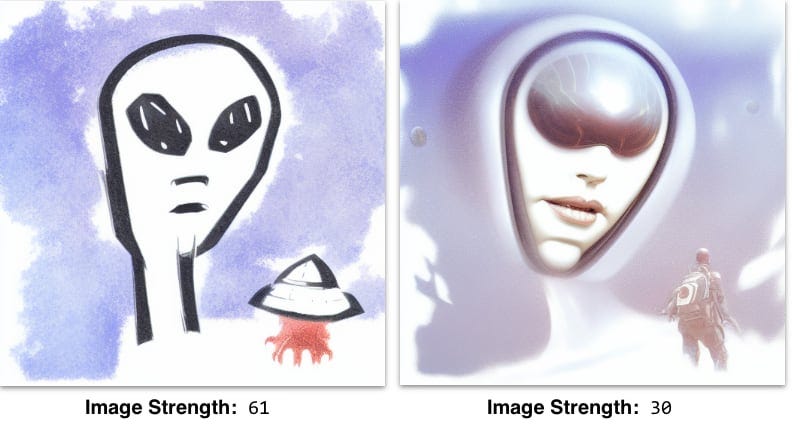
An image strength value that acts more or less like the cfg scale value does for the text prompt, i.e., it sets the amount of influence the image will have over your outcome.
So just as with text-to-image, you’ll have a text prompt and all the other options described above, but in addition to those, you’ll set the above two options.
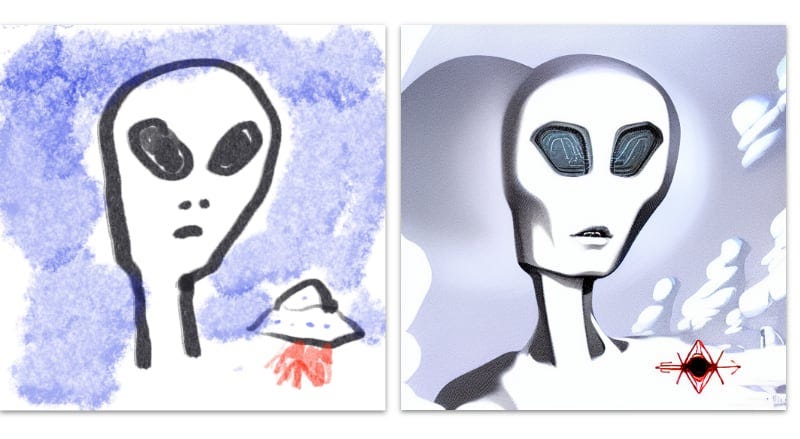
The trick with image-to-image generation is that you’ll need to work the image strength and cfg scale sliders in tandem to get the result you’re looking for. I tried a number of variants before I settled on the output you see above — some of them were just barely recognizable from my input image, while others were just a cleaned-up version of my sketch.
The composition of the prompt matters a lot, too. For the above, I used PlaygroundAI and some of their prompt modifiers to produce:
Alien head in front of a spaceship, professional ominous concept art, by artgerm and greg rutkowski, an intricate, elegant, highly detailed digital painting, concept art, smooth, sharp focus, illustration, in the style of simon stalenhag, wayne barlowe, and igor kieryluk.
I’m still exploring the different subject + style combinations, and given the combinatorial explosion of knobs I have to tweak, I’m sure I’ll be doing so for a very long time. Just like prompt engineering, transforming images with this tool will be its own art form, and you’ll benefit from as much practice and experimentation as you can get.
Inpainting
Stable Diffusion can be used to “fill in” the missing parts of images. My main application for this right now is when my output image is missing a part that I want to see. When this happens, I’ll upload the image to Dream Studio’s image editor, shrink it a bit, then put in the original prompt and seed combination.
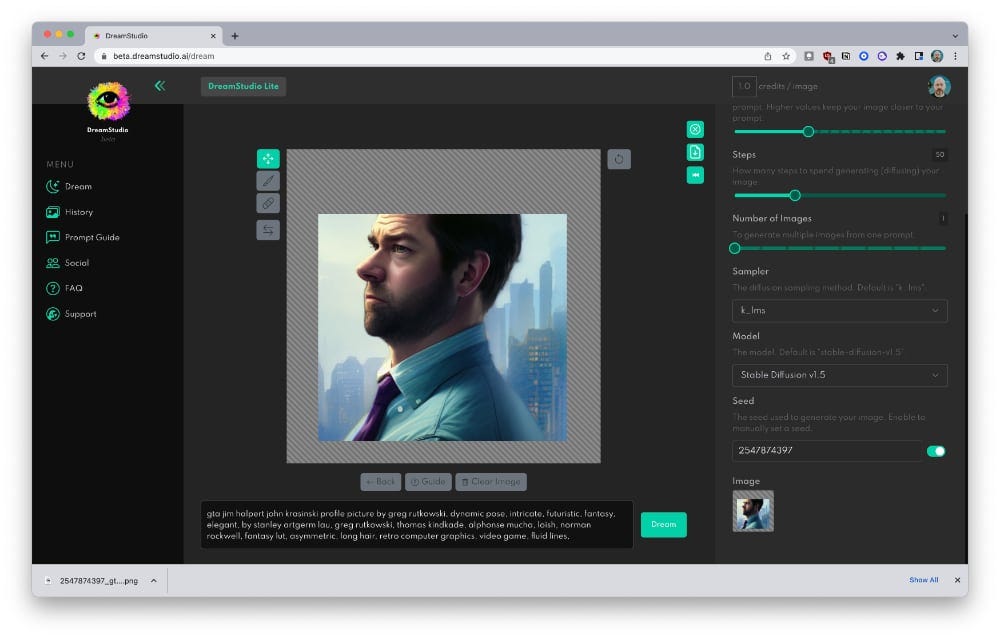
The results are pretty good but might need to be cleaned up in a traditional photo editing tool.
Local installation vs. cloud apps
When it comes to using Stable Diffusion, there are two main options:
Cloud applications where you pay by purchasing and spending credits.
A local installation that’s free to run and use.
Each of these has its advantages and disadvantages, which I break down, below.
Cloud pros:
Social
Can be used on tablets, Chromebooks, and other low-power devices
Fast access to the latest features and versions (this is a big deal in this space)
Cloud cons:
Metered billing via credits
It costs to experiment
The app you’re using could be manipulating your input prompt in opaque ways that change without you knowing it (i.e. they’re changing the alterations they make to your prompt which results in unexpected results).
Sometimes fewer options and less control
Local pros:
No need for a new account or any billing
Can experiment in unlimited amounts
Local cons:
Can be quite slow, depending on your hardware
You need real hardware to run it
Installers are still new and not as rapidly updated
Local apps are buggy, incomplete
If you go the command line route, installation can be a beast depending on your platform and your knowledge of Python tooling
If you have enough hardware to run Stable Diffusion reasonably — i.e., a mid-tier gaming PC or a high-end laptop, like a MacBook Pro M1 with at least 16GB RAM (more RAM is better) — then there’s no real downside to doing a local installation and using that for experiments.
With a local install, you can use a modified version of the workflow I describe, above:
Use a tool like Krea.ai for prompt discovery
Put those prompts into your local machine for experimentation and iteration
Warning: Unlike the cloud applications, some of the local options don’t keep track of past images alongside their prompts and seeds. Or maybe they keep track of the prompt but not the seed (DiffusionBee is this way). You really need this history if you’re going to learn and improve. So when you’re using your local installation, you may need to manually keep track of the prompt + seed + image combinations in some manner. Right now, my only recommendation is to save the image files with the seed and prompt as the filename, e.g. 15504320_rainbow_lolcat_cthulu_in_candyland_unreal_3D_trending_on_artstation.jpg.
Cloud apps with Stable Diffusion support:
Cloud app billing and credits
All of the cloud-based Stable Diffusion apps I’ve seen use a credit-based model, where you buy blocks of credits and then spend them generating images. The reason for this metered billing model is that using the Stable Diffusion to generate an image requires a non-trivial amount of computing resources.
Different options, like the number of diffusion steps (see above) and image size, require more computing resources at higher values. So as you’re generating images, pay attention as you tweak different knobs and sliders to see how they impact the cost per generation.
You can add computing resources to Stable Diffusion in two ways:
Linearly, by waiting longer for a generation to complete
In parallel, by throwing more hardware at the task and doing it faster
So as you drag certain sliders to the right and increase certain option values, you’ll need more computing resources, which will mean the image will be more expensive and will probably take longer (since most of the online platforms are going to scale via option 1 above, i.e. linear and time-based, rather than option 2, i.e. parallel and hardware-based).
How to run Stable Diffusion locally with DiffusionBee
As of right now, the best option for running Stable Diffusion on an M1 or M2-powered macOS device is a little open-source Electron app called DiffusionBee. This is not going to have the performance you could wring out of an optimized, heavily tweaked command-line installation, but if you just want to get up and going on Stable Diffusion for free then this is the best way I’ve found.
(Note: Once again, if you come across something better that I’ve missed, please drop a link to it in the comments, along with some color on why you prefer it! 🙏)
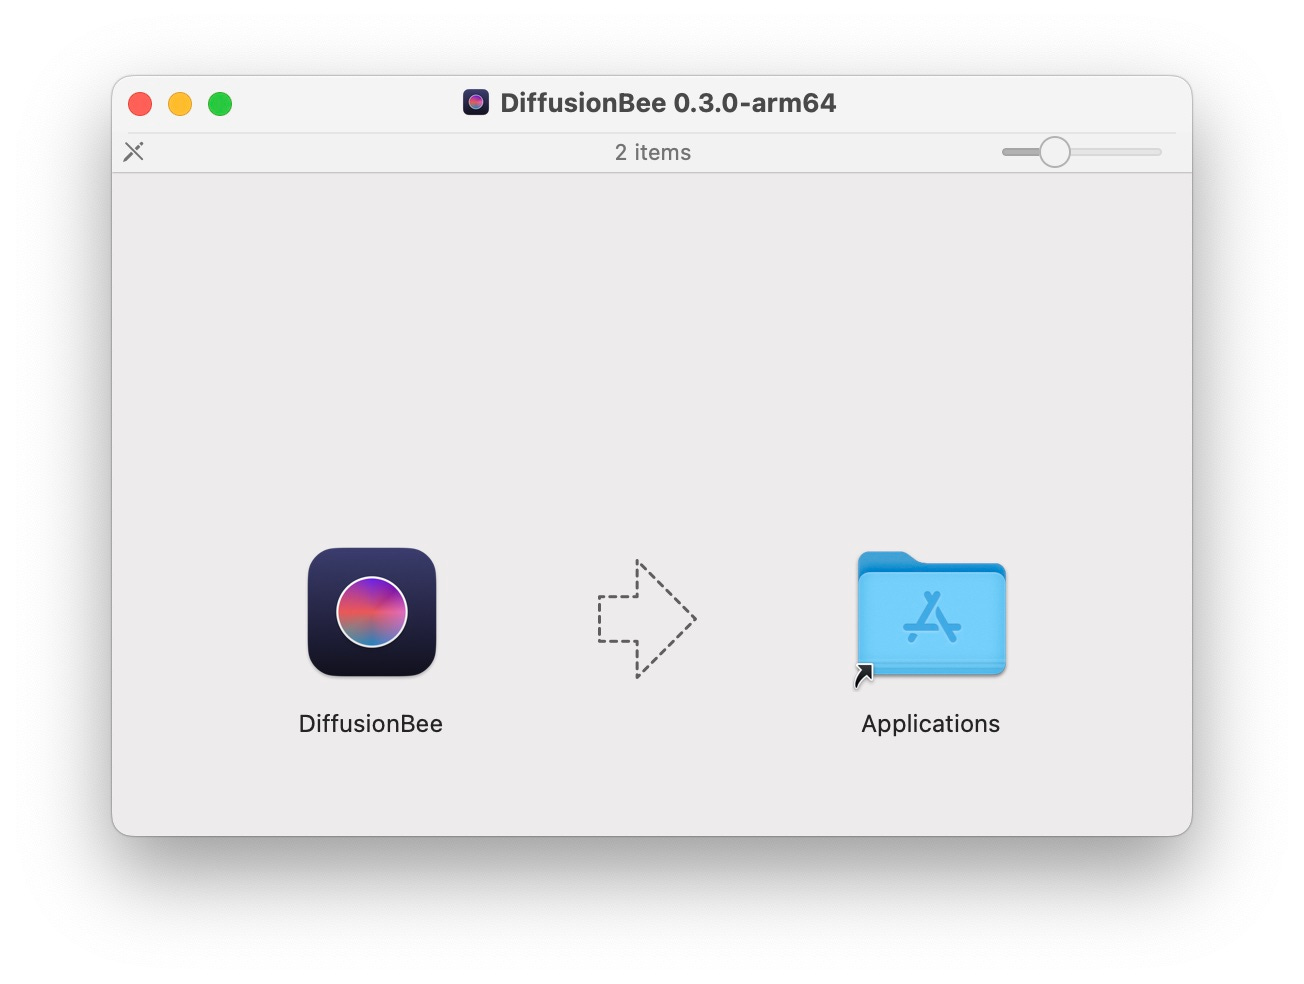
This app comes nicely packaged as a DMG file, so you use the standard non-App-Store download and install process.
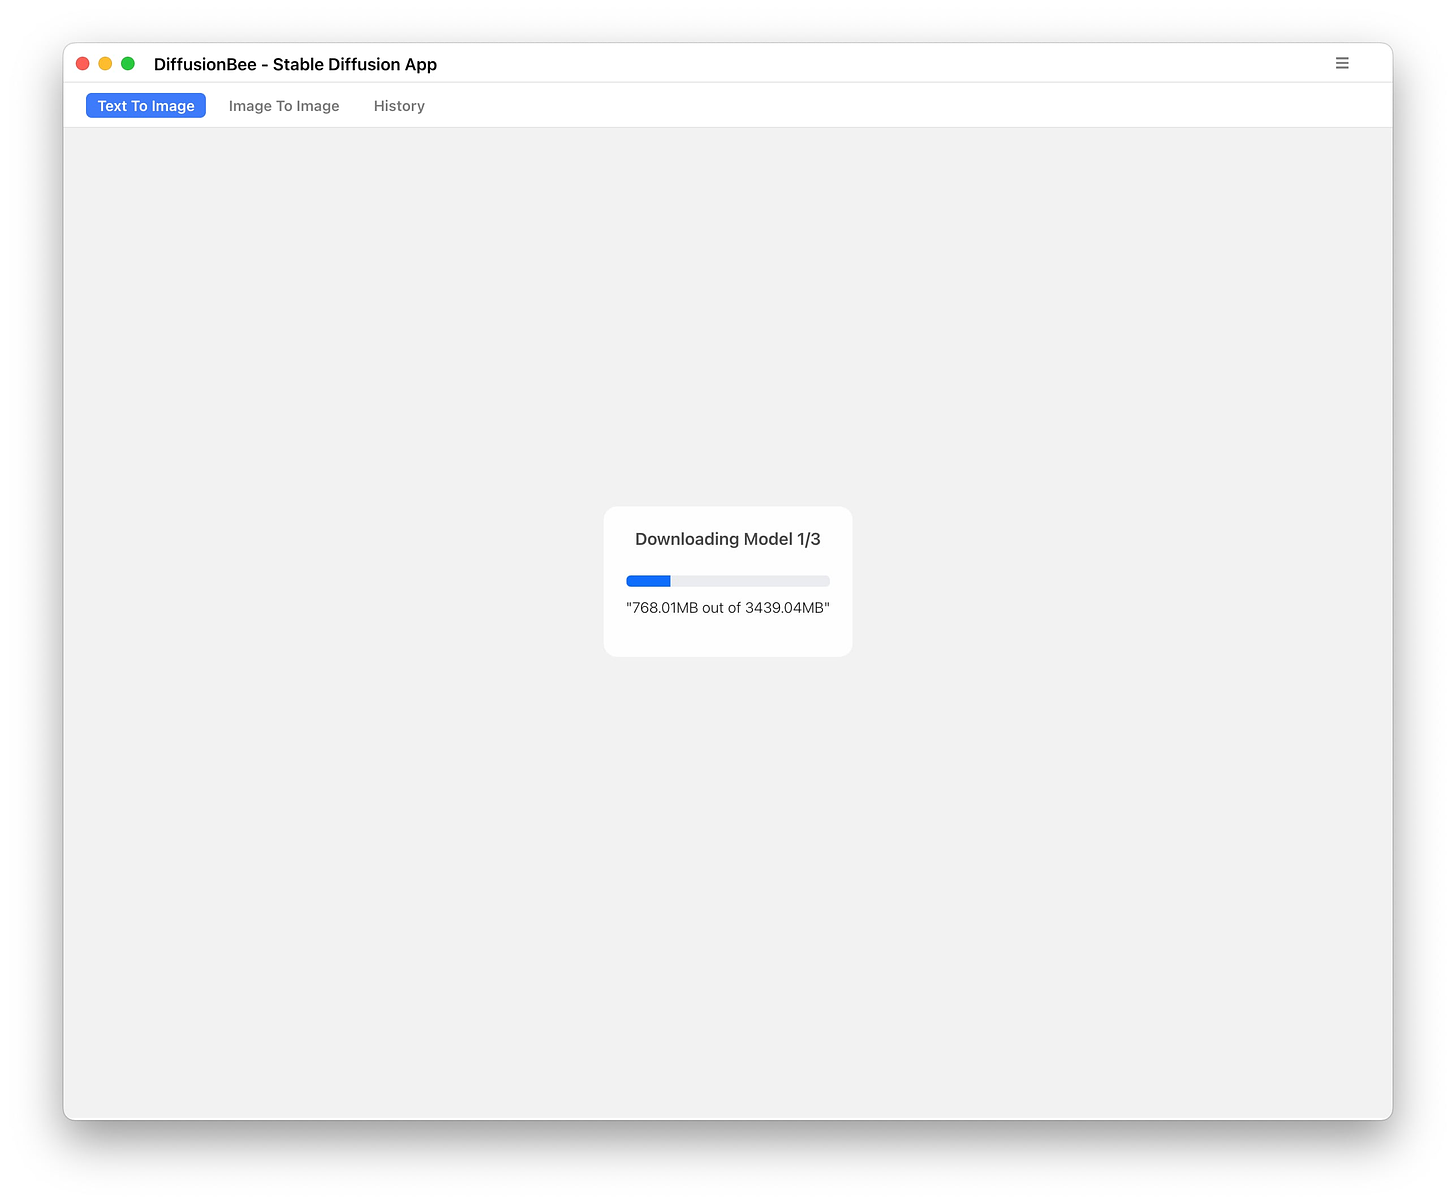
The latest version, 0.3.0, is 2.4GB, and once it runs it also has to download the model weights (about 3.4GB as of this writing, though I’ve seen them over 4GB before).
I’ve confirmed that if you interrupt the network connection while the weights are downloading, the download pauses and then picks back up when you turn it back on.
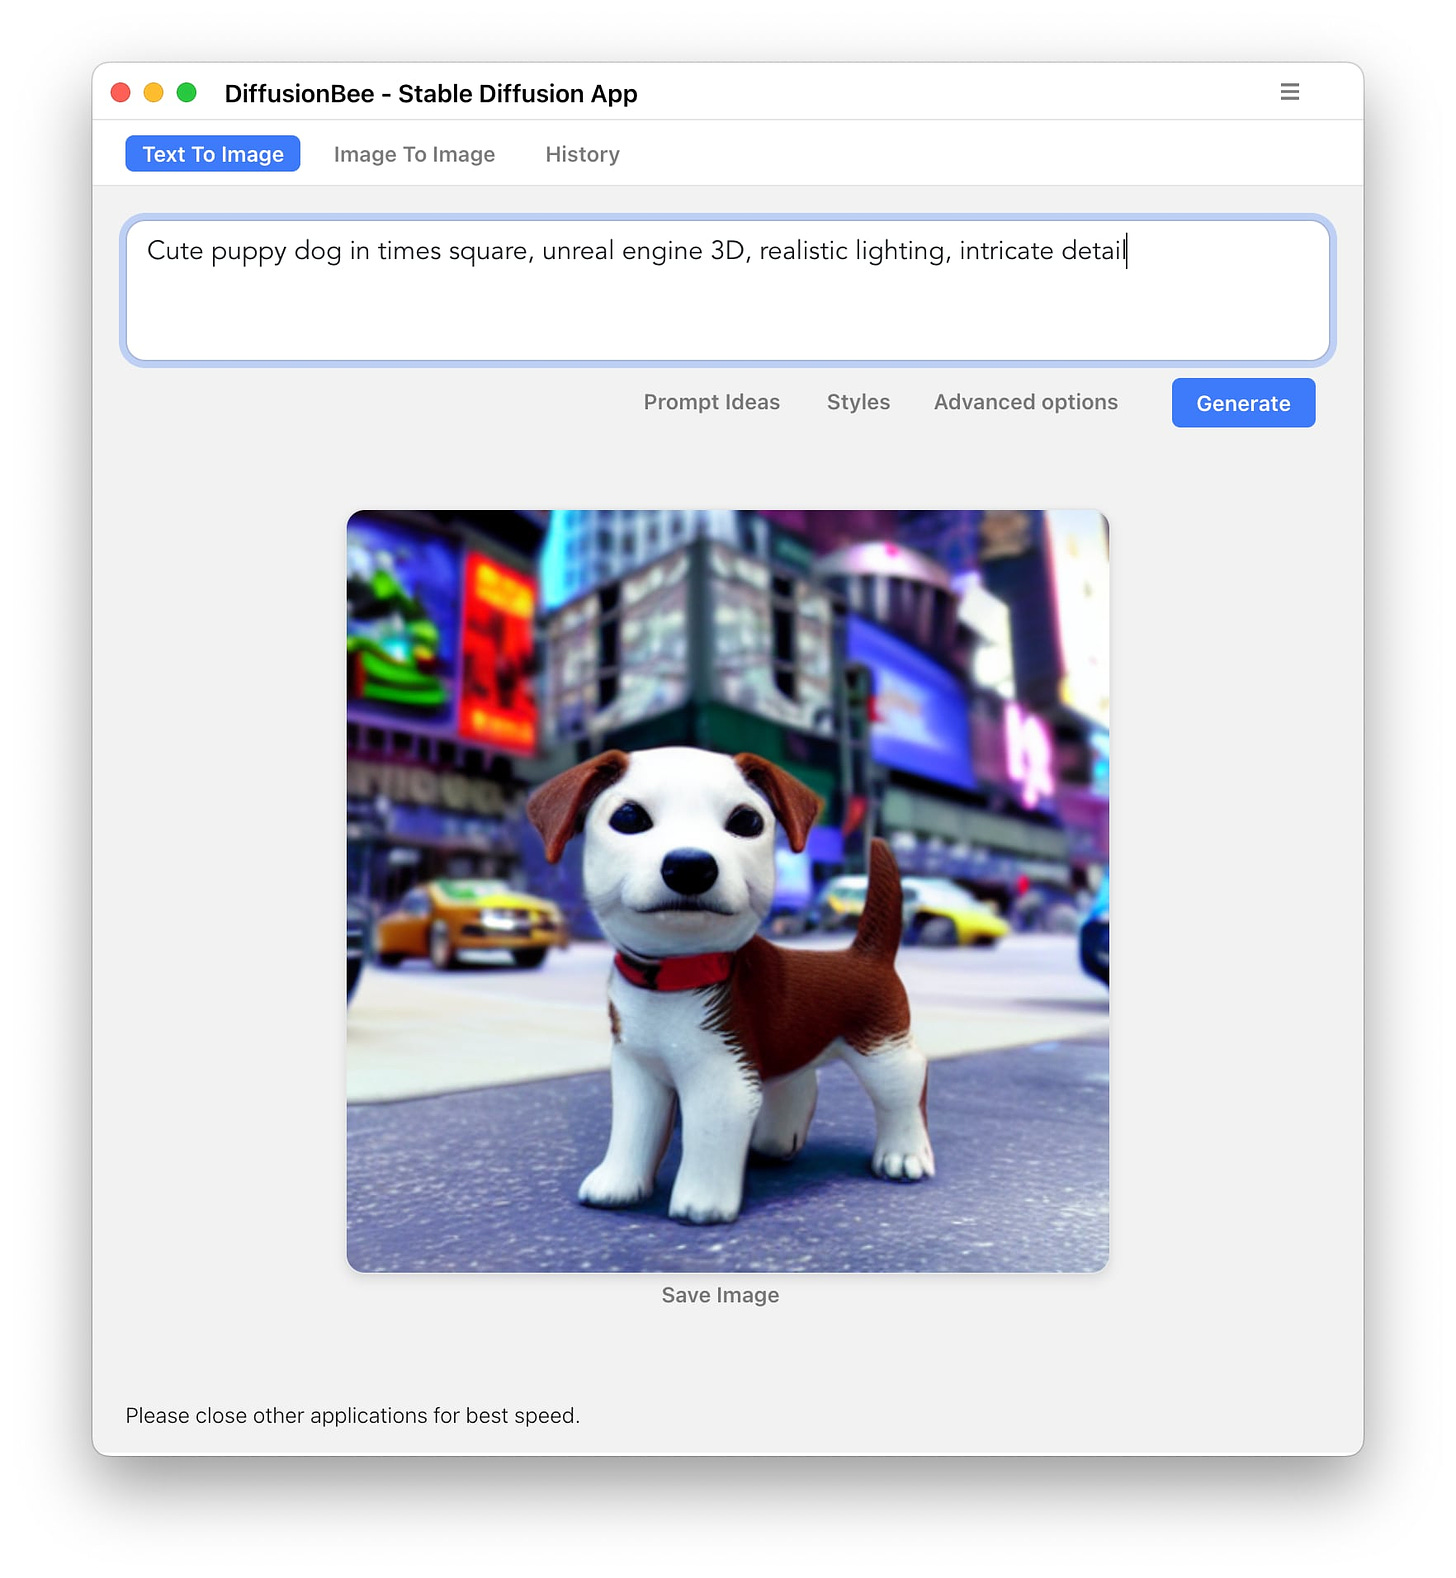
The interface is shown below, with a rendered prompt:
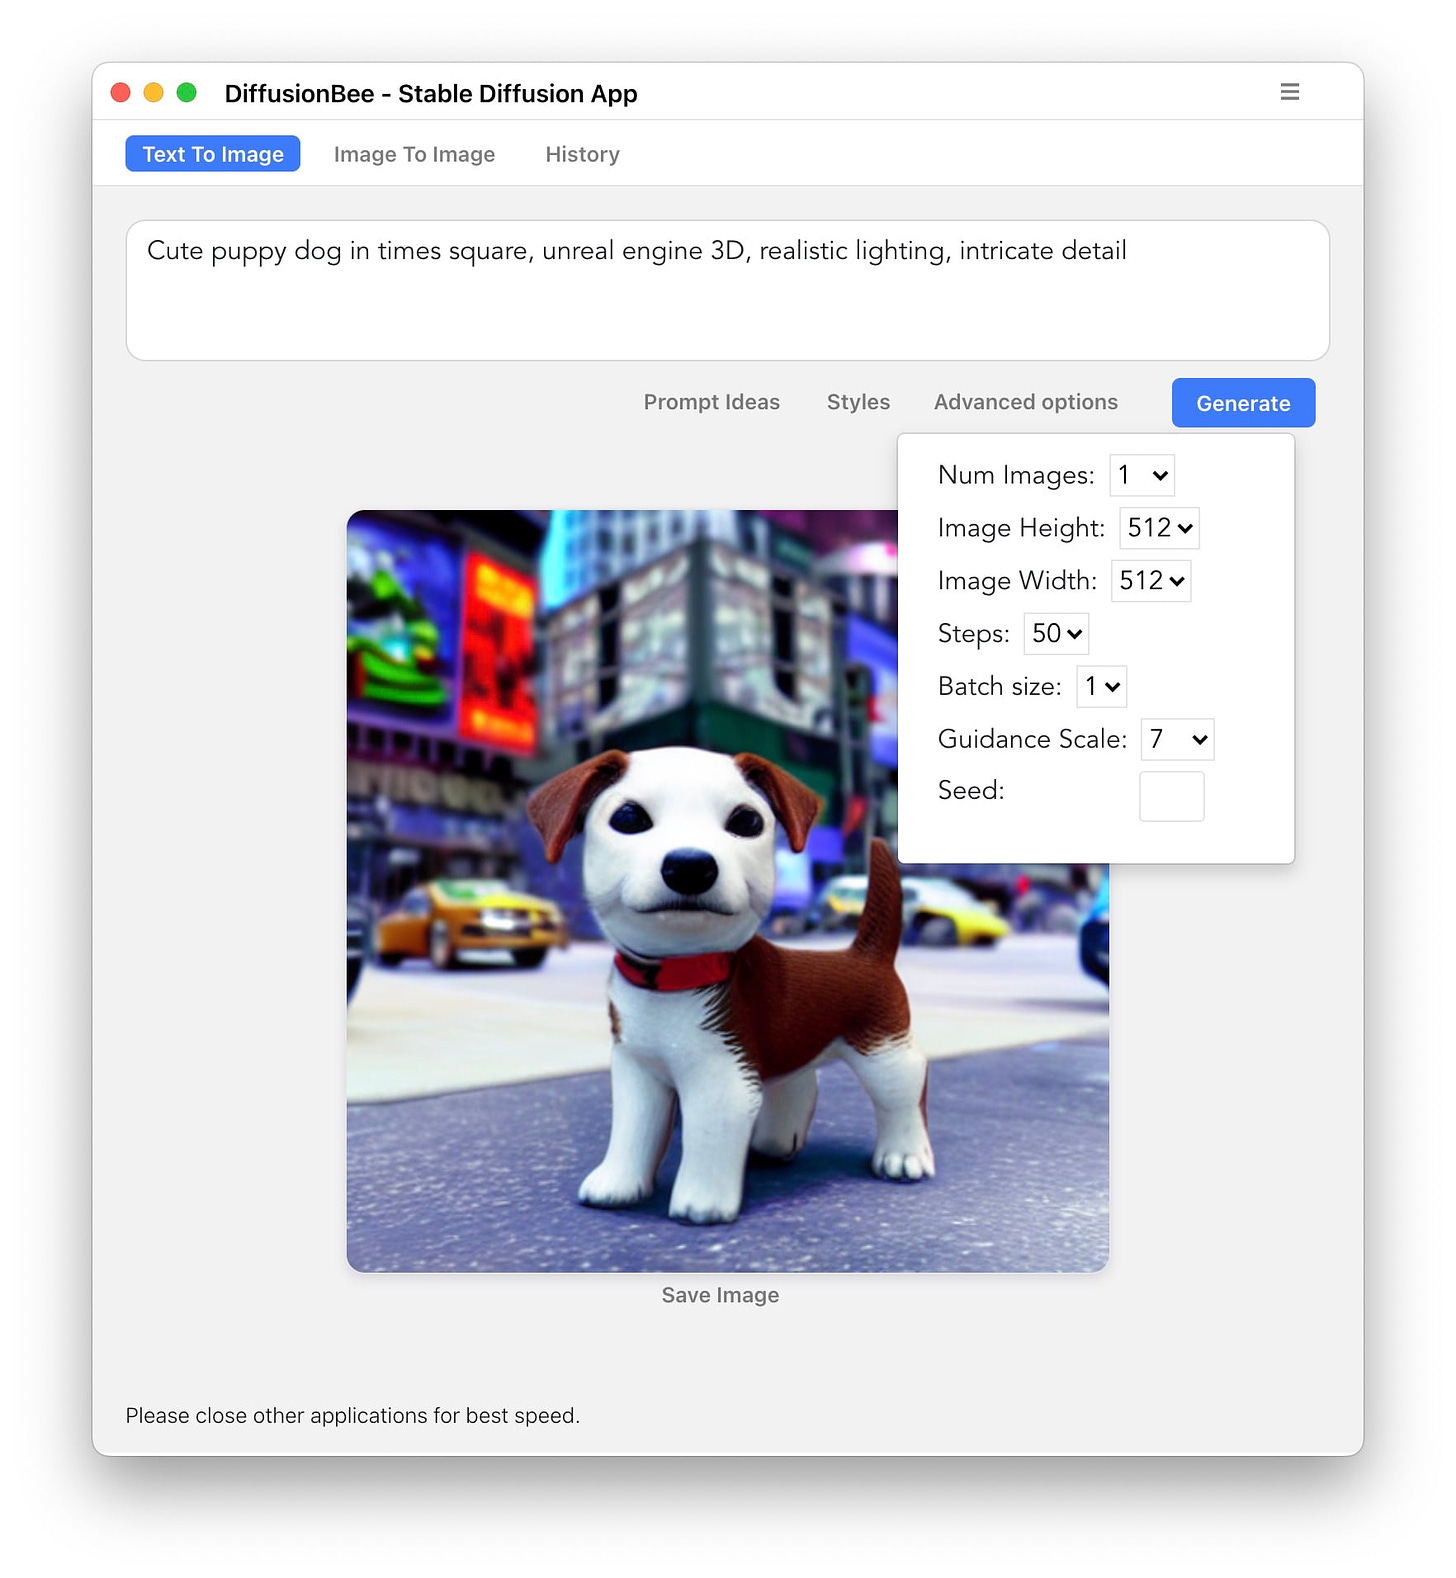
The advanced tab gives you access to the options you’ll want to play with, but there’s one thing missing, and it’s a pretty big omission: the random seed. You can enter your own seed and use it, but if your app generates a seed you’re never going to be able to figure out what it was. I can’t find any place in the UI, including the logs, that tells me what seed I used for a particular image:
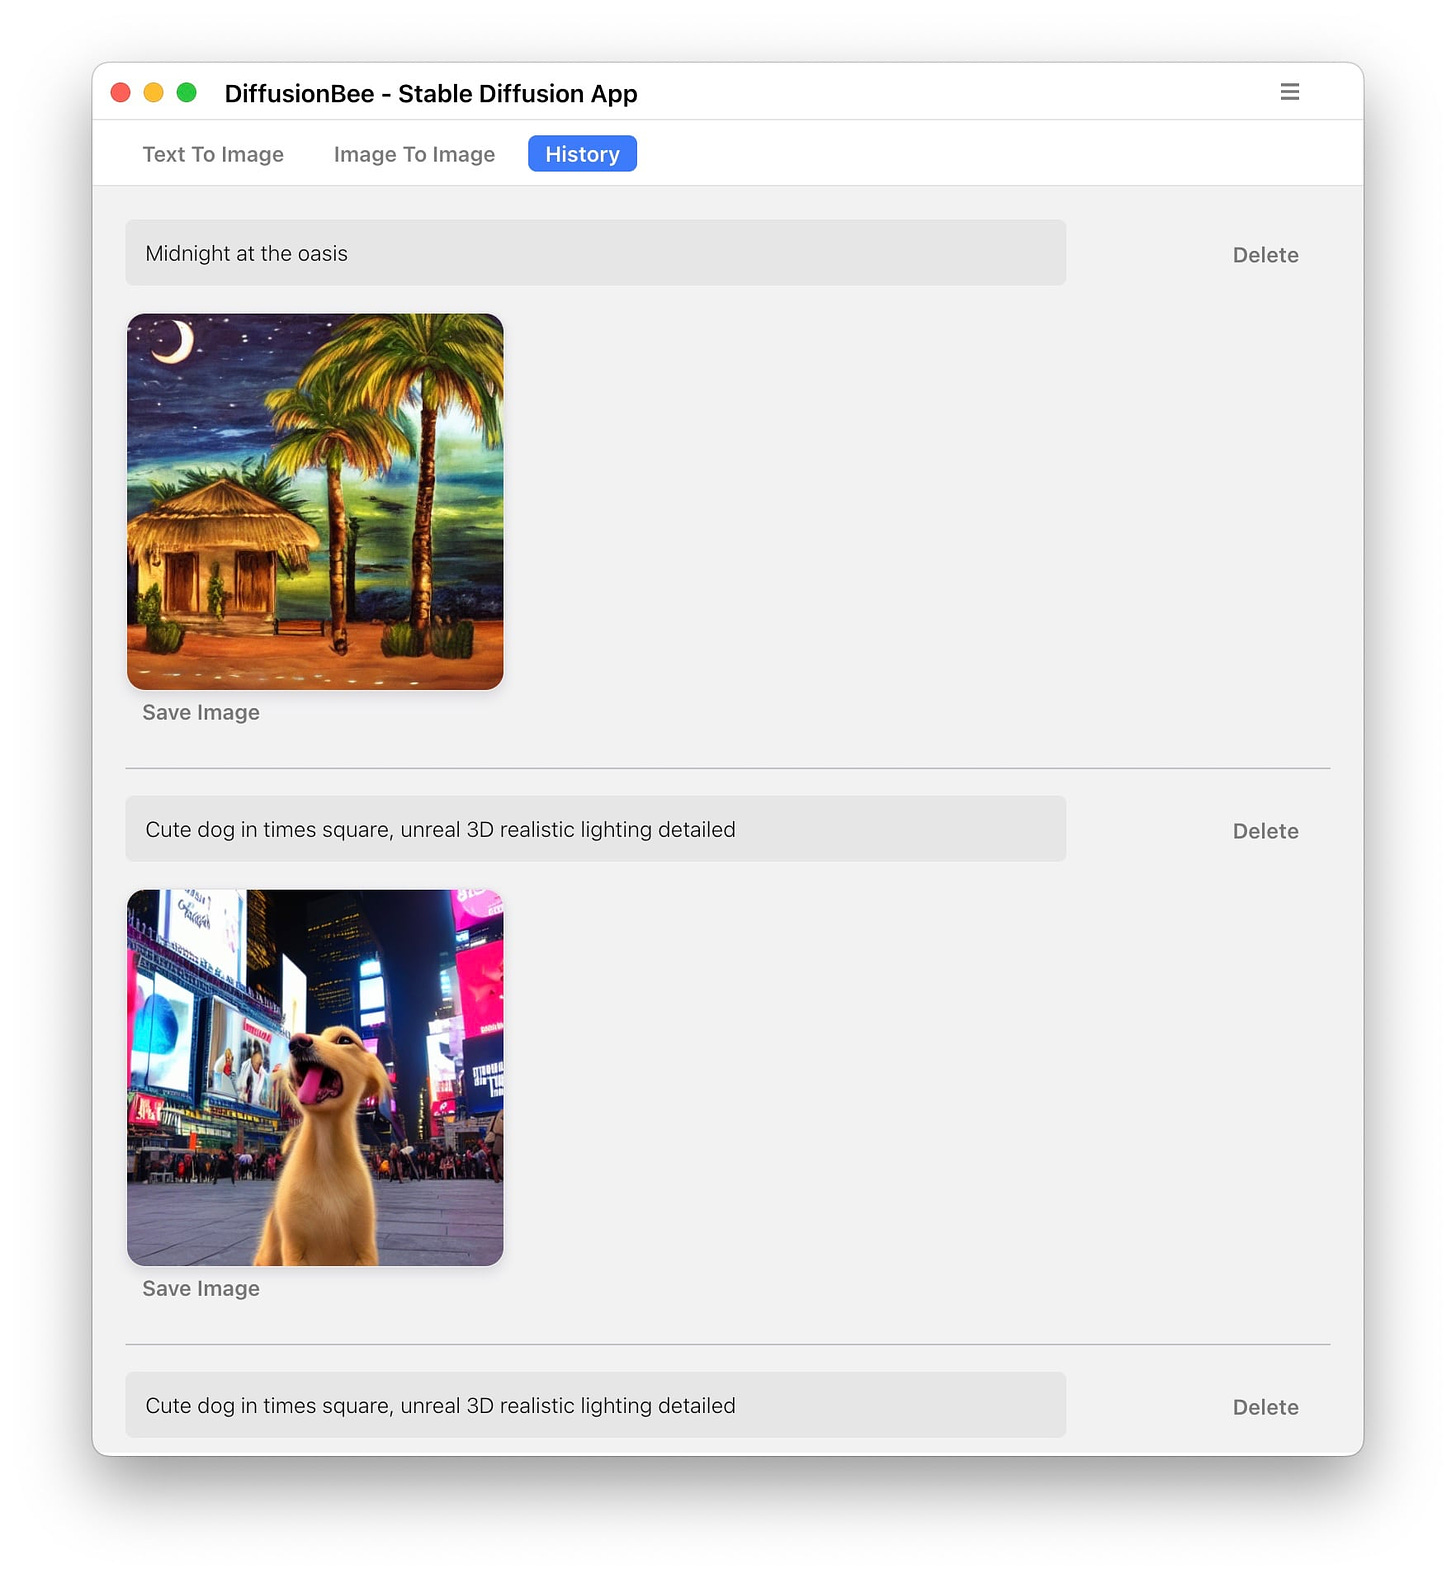
This lack of a seed extends to the history — it’s only showing the prompts, not the seeds. This is a pretty big shortfall, in my opinion. It can be remedied by always bringing your own seed and keeping track of it somehow, but this is a pain. Hopefully, this seed issue will be fixed in the next version.
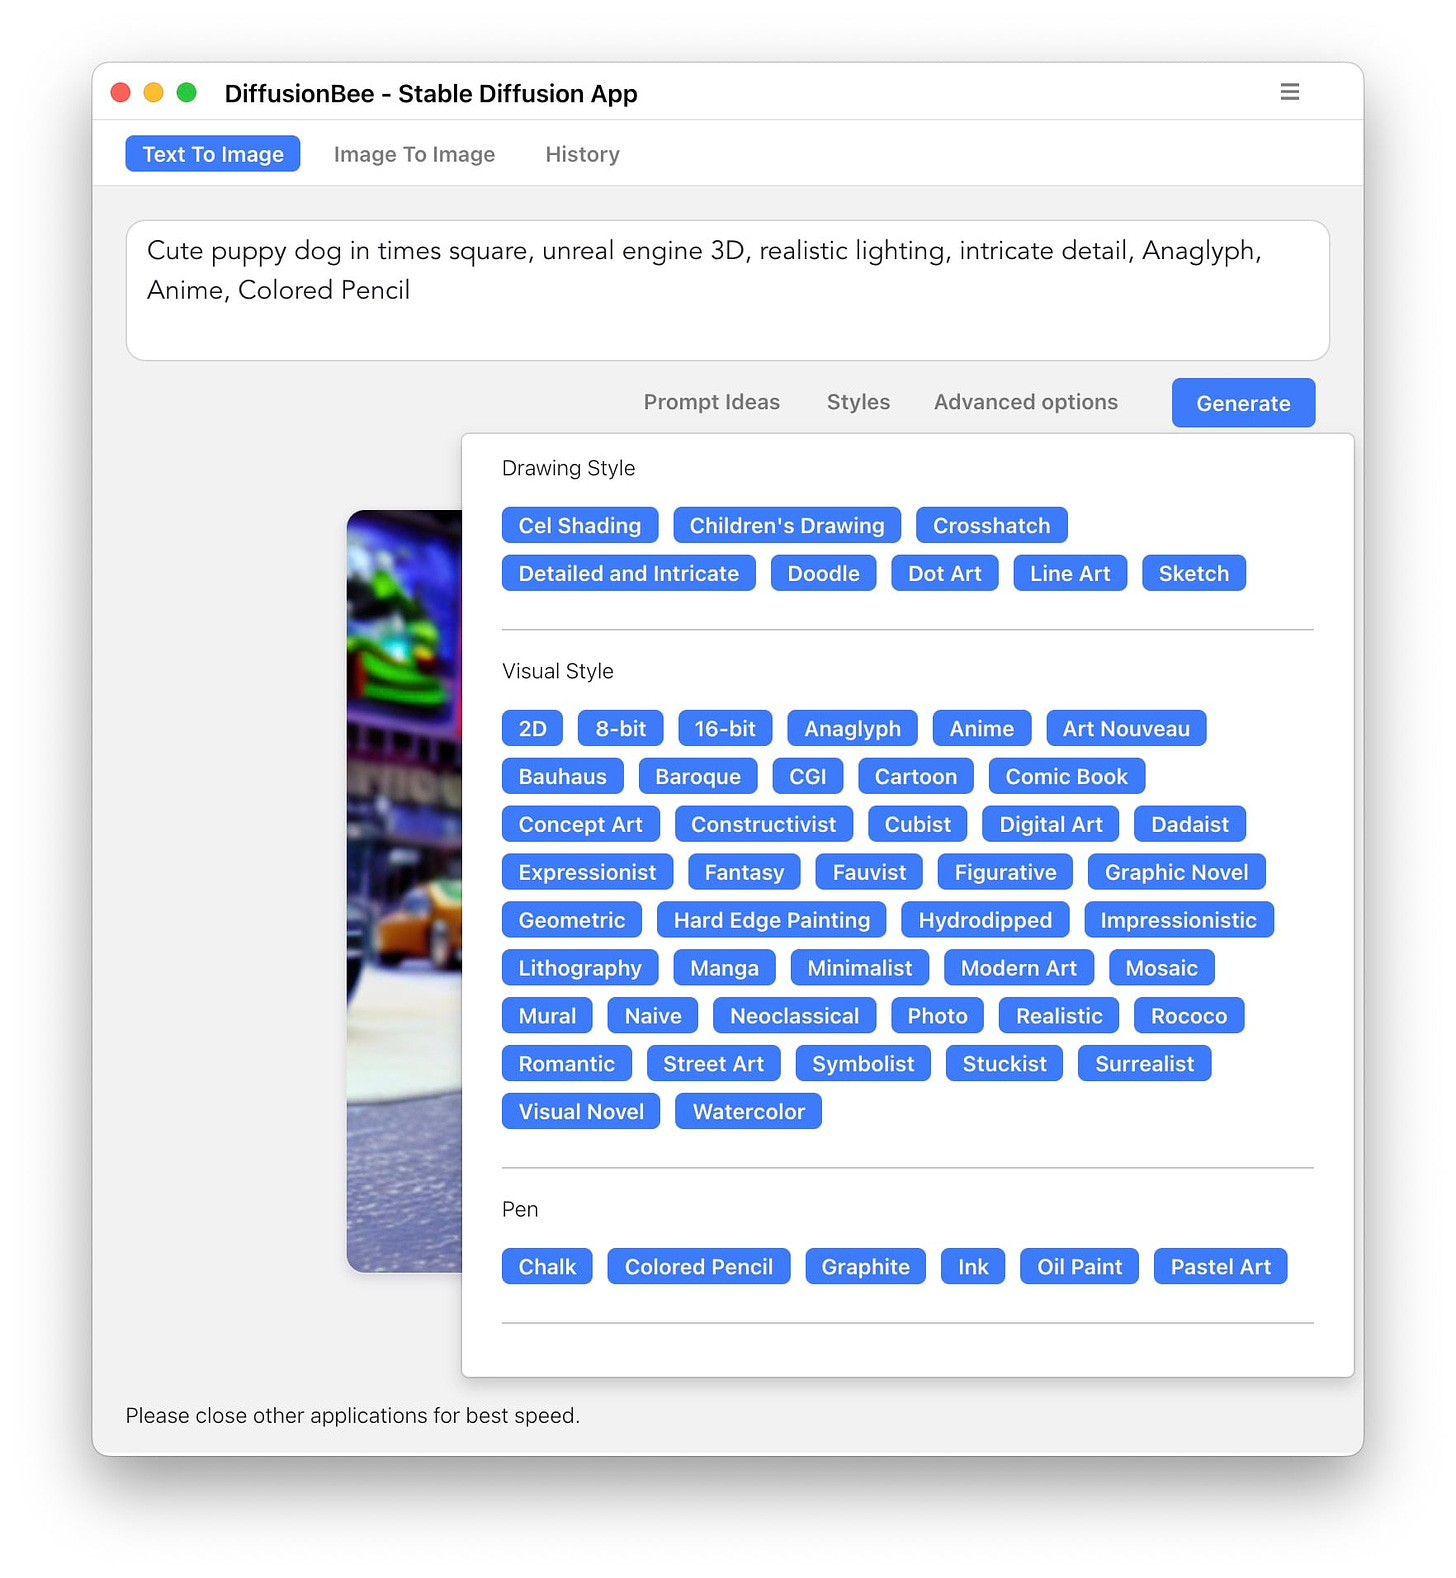
My favorite feature of DiffusionBee so far is this little Styles pallet. You click these styles and it just adds the text string to your prompt. This kind of transparency is the correct way to go about this. (PlaygroundAI does this, too.) I have a ton of style modifier ideas there that are just a click away, and I can edit them easily and save the resulting prompts. I hope other apps imitate this.
What about using the command line? you ask. That is a whole other project, but a necessary one (for now) if you want to customize the model with your own images (a.k.a. textual inversion). That deserves its own dedicated guide.

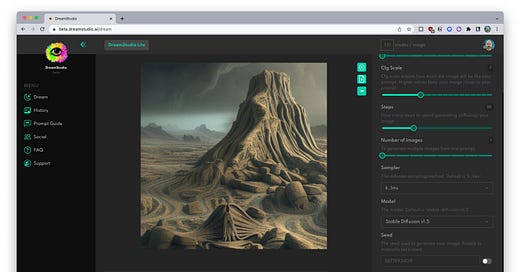



May be worth knowing about Automatic1111 (https://github.com/AUTOMATIC1111/stable-diffusion-webui) for Windows/Nix environments. It's less important there than for the goofiness that is Mac, but convenient and has a lot of useful tweaks easily available, albeit without the low-spec compatibility of some command-line options like the basujindal fork.
Will also likely help a lot of people to know the underlying limits to CLIP; with a few specialized exception forks that break up prompts, a prompt can only have 75 tokens (the AI's equivalent of syllables, but not quite?) to work with for SD. Some UIs will warn about exceeding token max, but most will silently truncate.
Some UIs expose prompt highlighting and/or cross-attention, which can allow you to put more emphasis on a part of a prompt, or even change the emphasis at certain progress steps. This is a complex tool, but if it's supported can give a lot of good options for more subtle or smaller details.
Lastly, be aware that prompt order, punctuation, and even capitalization matter. Putting styles earlier seems to give more refined pictures but less control over content, while putting styles only at the end of a long prompt can have their effects be less severe -- sometimes it can be worth it to give a weak style guide (eg, "portrait", "photograph", "realistic", "cartoony") in the front half, and then more specific style or artist terms toward the tail end. If a prompt seems to be getting ignored, sometimes adding commas or periods before and after can help.
Updated DiffusionBee now records the seed used (& all other settings used) in the history tab.